Getting Started
Twelve bits, 26 kilohertz, eight faders and a handful of buttons. This chapter gets eSPi running, walks you once around the faceplate, and has you recording a beat before the coffee gets cold.
What is eSPi?
eSPi is a 12bit DAW that brings back the sound and the workflow of the SP-1200, the 12-bit sampling drum machine behind decades of hip-hop and house music.
It has an extremely accurate emulation of the gritty converters and filters and the entire sound stage of the original machine, the same workflow but enhanced, and full .sp12 and .HFE disk import and export so projects made on eSPi can be loaded on a real SP1200, and projects from an SP1200 can be loaded in eSPi. Full compatibility.
The sound of eSPi is virtually impossible to tell apart from a real SP1200 in a blind test (video coming soon)
Around that core sit the things the 1987 machine never had: resampling, a waveform editor with auto-chop, an effects rack, a mixer, a sample library, hosted plugins, a visual sequencer, a DJ turntable and much more... eSPi runs as a standalone app and as a plugin inside your other DAWs.
Formats and platforms
| Platform | Standalone | Plugin formats |
|---|---|---|
| MacOS | Yes | VST3, AU, AUv3 |
| Windows | Yes | VST3 |
| Linux | Yes | VST3 |
| iPad / iPhone | Yes | AUv3, for host apps such as AUM, Cubasis or GarageBand |
| Android | Yes | None |
In a DAW, eSPi loads as an instrument, so look for it in your host's instrument list, not under effects. Using it inside a host is covered in eSPi in Your DAW.
eSPi also opens three kinds of document straight from Finder or Explorer:
.espiis an eSPi project..sp12is a disk image for the Rossum SP-1200 reissue..hfeis a floppy image for an original SP-1200 floppy emulator.
Ground rules
A handful of habits run through the whole machine. Learn these six and every menu will feel familiar.
- One menu at a time
- Setup, Disk, MIDI and Sample each have a button with an LED. Press one and its LED lights. Press it again, or press Tempo, to leave. Only one can be open at once.
- Items have numbers
- Every menu item is printed on the faceplate with its number. Type the number on the numpad, step through with ◄ ► and press Enter, or simply click the label.
- Leading zeros
- Two-digit fields want two digits. Segment 5 is 0 5, and Setup items run from 10 to 21. The first digit waits on the LCD for the second.
- 9 is Yes, 7 is No
- Whenever the LCD asks (yes/no), 9 or Enter confirms and 7 backs out. On project and export screens, 0 means exit.
- Segments and songs
- Segments are your scratchpad: patterns of 1 to 99 bars, numbered 00 to 99. Songs chain them together. The Song/Segment button flips between the two. The labels above the eight Programming buttons apply while you edit a song, and the labels below apply the rest of the time.
- Tempo gets you out
- Lost in a menu? Tempo (=) closes whatever is open and drops you at tempo entry. Press it again for the home screen.
First launch
The first time it opens, the standalone window is centred at 894 × 671. You can drag it anywhere from 560 × 420 up to 2234 × 1678. The machine always scales in proportion and is never stretched, and eSPi remembers the size and position for next time. Press F11 (or use View › Toggle Fullscreen) to go full screen.
The window title shows the project name, with an asterisk when there are unsaved changes. For example, My Beat* - eSPi.
The stock kit
So you are never staring at silence, eSPi fills every empty pad with a bundled sound at startup: 32 sounds, eight per bank. Bank A is a ready-to-play kit (kicks, hat, snare, keys and bass). Banks B to D hold extra drums, lo-fi kits, stabs, breaks and basses. To start with empty pads instead, turn off Stock Samples in Settings › Engine.
A fresh project starts on segment 01 at 90 BPM. The LCD tells you so:
The home screen. Whenever you get lost in a menu, this is where you are trying to get back to. The Tempo button always gets you out.
Licence and editions
eSPi comes in two editions: eSPi Essentials, the machine and everything you reach from it, and eSPi Studio, which adds eight views, more effects and SP-1200 disks. Every computer can try eSPi Studio for free (the trial length is shown in the app). Activating your licence, the trial, locked views, upgrading, the update strip and news are all in Editions and Licence.
A tour of the faceplate
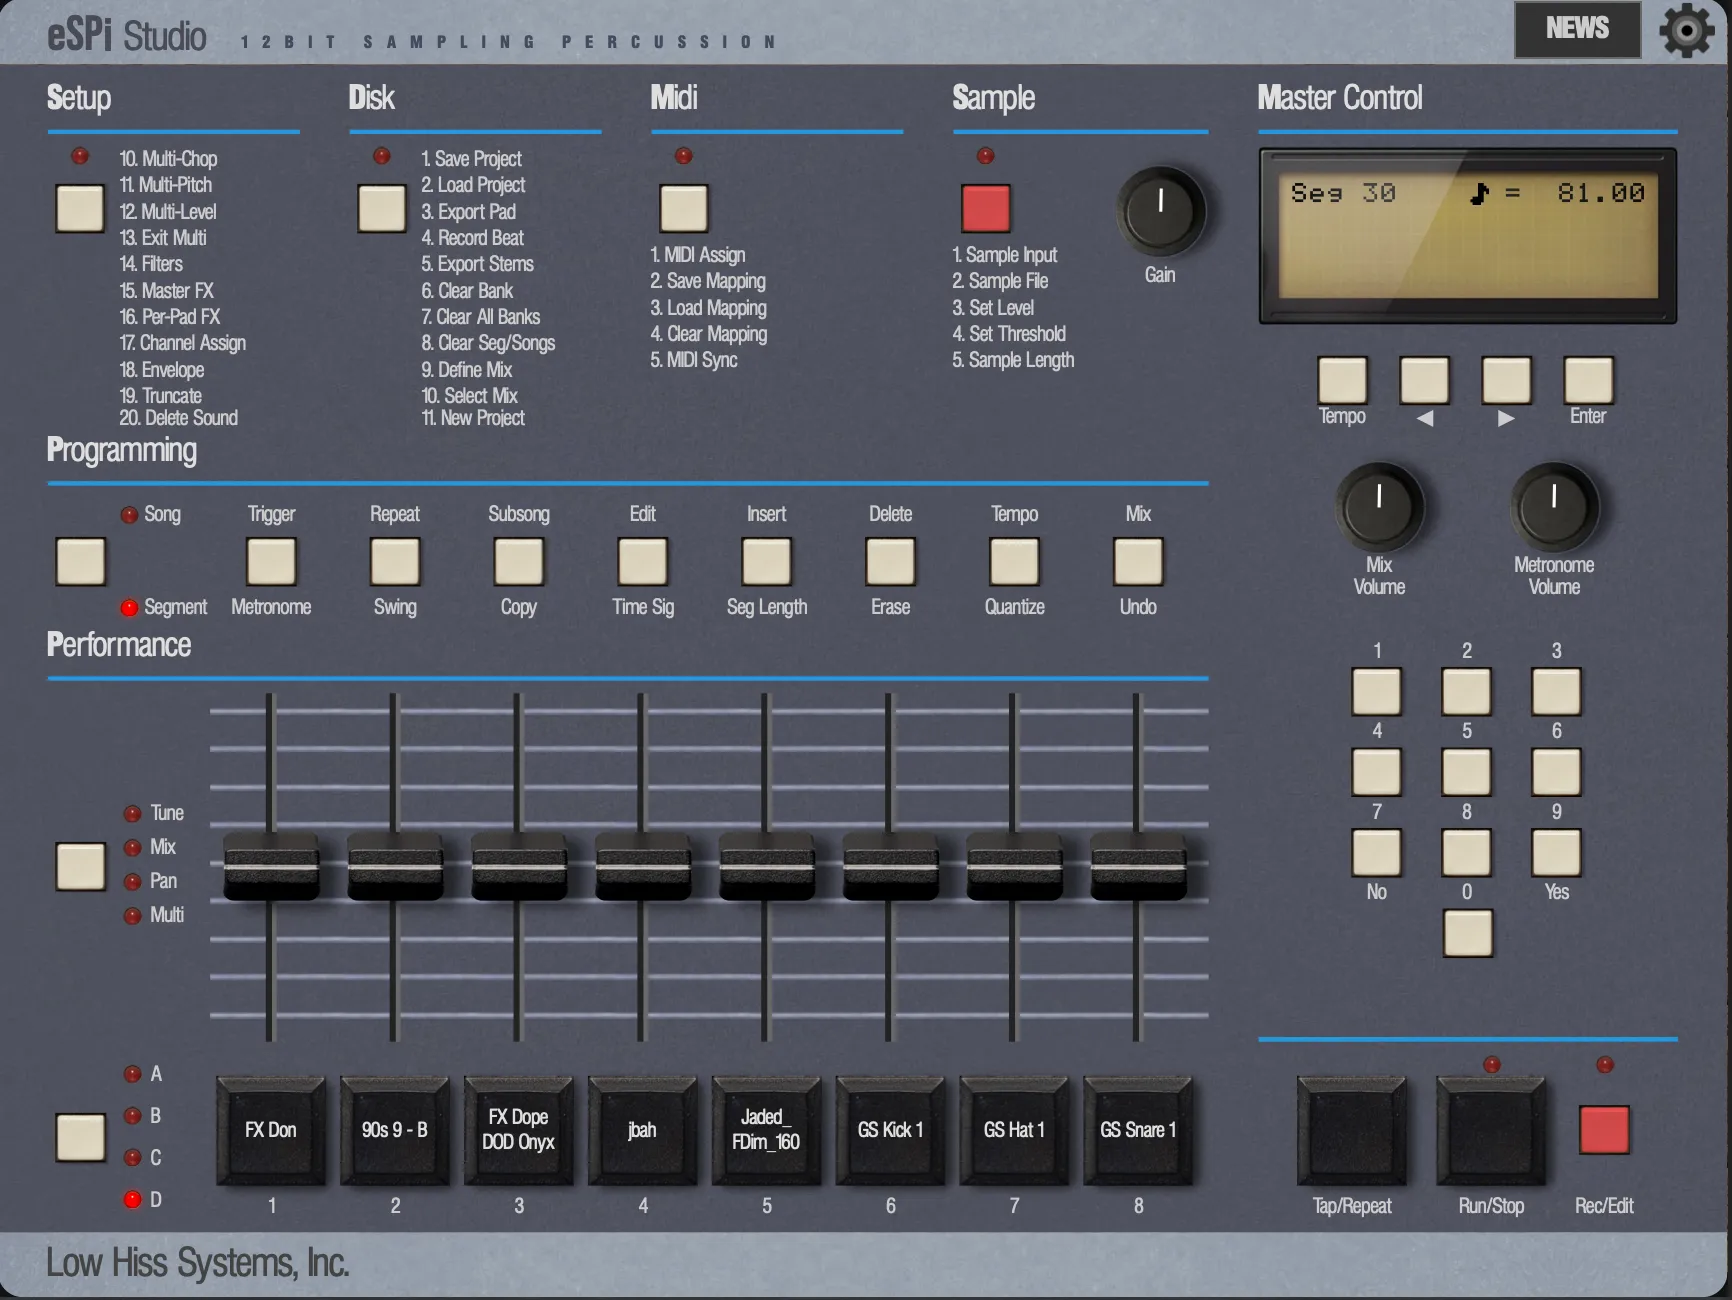
Everything that made the SP-1200 fast is still where your hands expect it. Here is the whole face at a glance. The Machine chapter goes through each section in detail.
 1
2
3
4
5
6
7
8
9
10
11
12
- Menus. Setup, Disk, MIDI and Sample, with every item listed on the faceplate. Click a label to jump straight to it.
- Gain. Input gain for live sampling.
- LCD. Twenty characters, four lines. It shows what every button is doing.
- Tempo, ◄, ►, Enter. Move through menus. Tempo is also the universal way out.
- Mix Volume and Metronome Volume. Master output and click level.
- Numpad. Type values and menu numbers. 7 doubles as No and 9 as Yes.
- Programming. Song/Segment, then Metronome, Swing, Copy, Time Sig, Seg Length, Erase, Quantize and Undo.
- Performance. The mode button and eight faders: Tune, Mix and Pan for each pad, plus Multi-Mode.
- Bank. Steps through banks A, B, C and D.
- Pads. Eight per bank, 32 in all. Click, tap, play from the keyboard or play from MIDI.
- Transport. Tap/Repeat, Run/Stop and Rec/Edit.
- Settings. The gear opens every option eSPi has.
Down the left edge, the sidebar opens the full-screen views: Library, Waveform Editor, Sequencer, Piano Roll, Song Timeline, Song Tracker, Effects, Plugins, Mixer and Turntable. On iPad the same buttons sit in a row along the bottom. On a phone held sideways they stay in the sidebar when the screen is wide enough, and move to the bottom row when it is not. On a phone held upright they are listed in the views menu, behind the round button beside the eSPi logo.
Play it from your computer keyboard
eSPi maps the whole faceplate onto your keyboard. The keys work by position, so the layout is the same on QWERTY, AZERTY and QWERTZ keyboards. The ones you will use in the first five minutes:
| Key | Does |
|---|---|
| Z X C V B N M , | Play pads 1–8 of the current bank |
| Left Alt | Next bank (A → B → C → D) |
| Space | Run/Stop |
| Right Alt | Rec/Edit |
| = | Tempo (and "get me out of here") |
| Left Shift | Performance faders: Tune → Mix → Pan → off |
| Q W E R | Setup, Disk, MIDI and Sample menus |
| Cmd/Ctrl + Z | Undo |
The full map is in Shortcuts & Gestures.
Instant gratification: your first beat
Too impatient to read the whole manual first? Good, so was everyone else. Ten minutes, the stock kit, and the same record-as-it-loops workflow that built a thousand records.
1. Set the tempo
- Press Tempo (or =). A cursor blinks on the BPM.
- Type 9 2 0 0 for 92.00 BPM. The value applies on the last digit. You can also tap Tap/Repeat in time to set it by feel.
- Press Tempo again to return home.
2. Choose the length and the grid
- Press Seg Length (G), set 2 bars with ►, and press G again to leave.
- Press Quantize (J). The LCD calls it Auto-Correct. Leave it on 1/16 so hits snap to sixteenth notes as you record, or pick HiRes to keep your feel, snapped only to the fine Sequencer Resolution clock.
- Optional: Swing (S). 50% is straight; ► steps through the SP-1200 presets 54, 58, 63, 67 and 71. Swing is applied on playback, so you can change it any time.
3. Record
- With the transport stopped, press Rec/Edit (Right Alt). The metronome counts you in, and the countdown shows on the LCD.
- Play the kick on X and the snare on V. The segment loops, and what you play on one pass is heard from the next.
- Keep it rolling and add the hat on C. Each pass adds notes. This is overdubbing, just as on the original.
- Press Rec/Edit to stop recording. The loop keeps playing so you can listen back.
- Press Run/Stop (Space) to stop.
4. Shape it
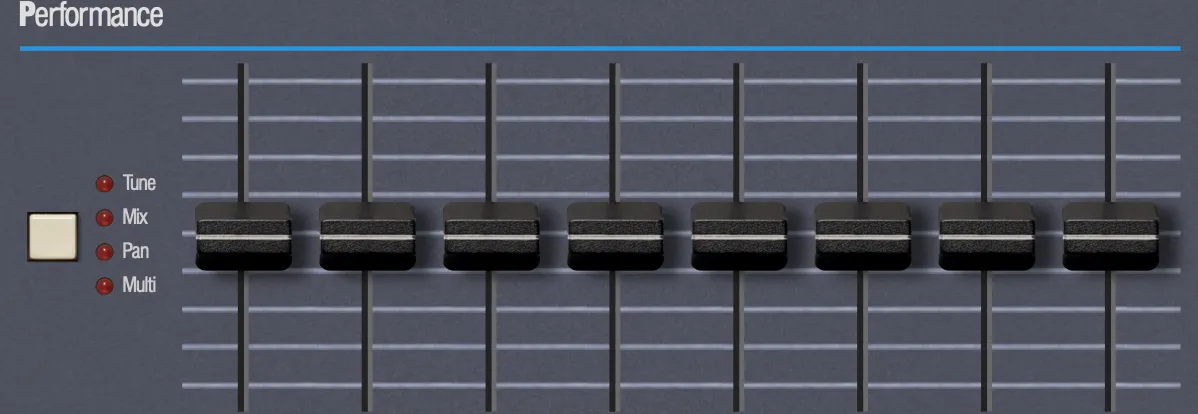
Press Left Shift once. The eight faders now tune the eight pads, one fader per pad. Drag a fader down to drop the snare a few semitones. Press Left Shift again for Mix (level), then again for Pan. Double-click any fader to reset it.
5. Save
Press Cmd/Ctrl + S, or press Disk (W), then 1, then 9 (Yes) on the numpad. Name the project, and eSPi writes a single .espi file that holds everything: pads, sounds, sequences, songs, mixer and effects. More in Projects & Export.
Where to go next
Congratulations: you have now used about half a percent of eSPi. The rest of this manual covers the other ninety-nine and a half.